Contents
Usage of the Web translator
The web translator works with a web browser. For your own safety, avoid using passwords that are really important to you. Also, ensure the site you visit uses a https prefix (for example https://translator.example.org/) rather than http, since passwords are sent over the network.
To start using the web translator go to the root of the site.
The root page
Open a web browser, and go to the site. You will see a page like shown below.
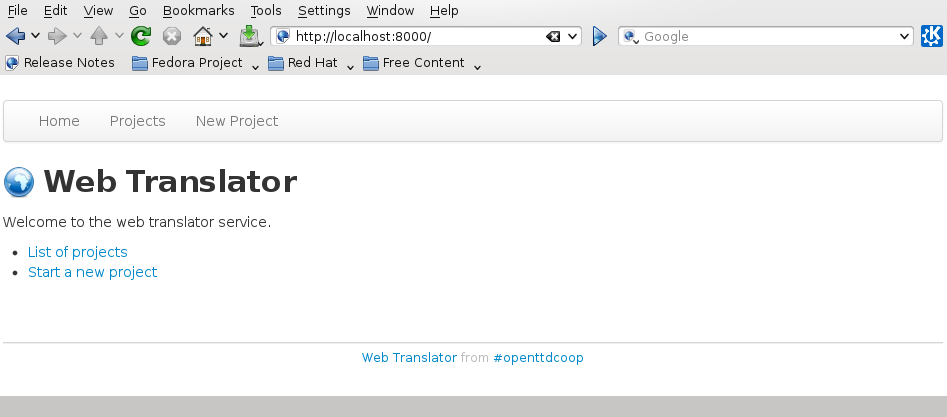
The first link will bring you to an list of projects that have translations at this server. This is explained further at Projects list.
The second link allows you to create a new project, explained further at Create a new project. (You will probably need to be a project administrator to do this.)
Projects list
The projects list looks like the image below.
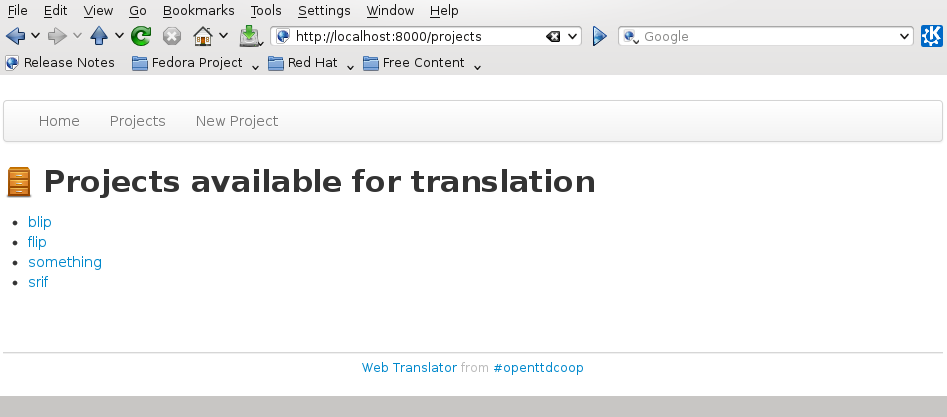
It gives you an overview of the projects that exist at the site. To start translating, pick a project, and click at its link. That will bring you to the Project overview page.
Project overview
The project overview displays what the project contains. If it is empty, it looks like
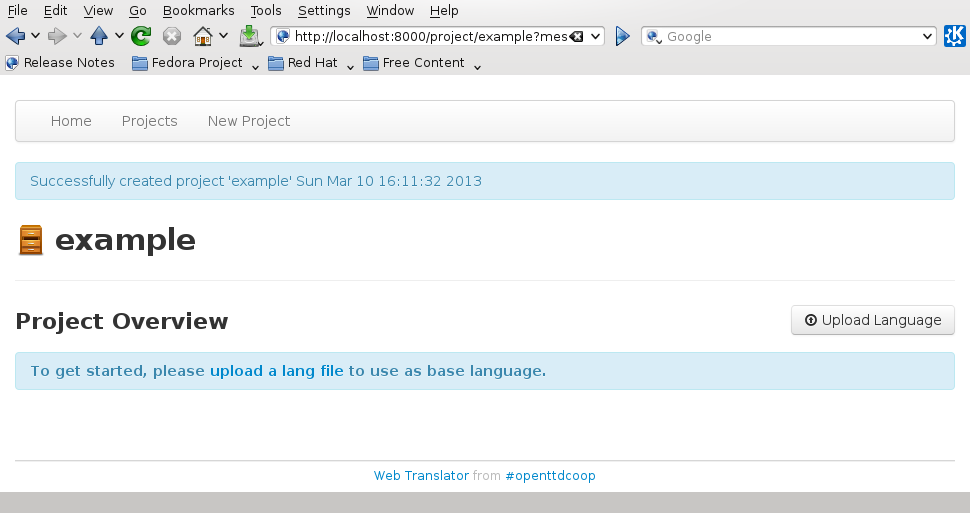
In Eints, a project has a base language that defines what strings exist, as well as what each string should express. In addition, you can have translations, which have the same set of strings (if they are complete). The first thing to do is Upload a language (works for uploading base languages as well as translations).
If you have uploaded a base language as well as some translations, you’ll get a project overview like
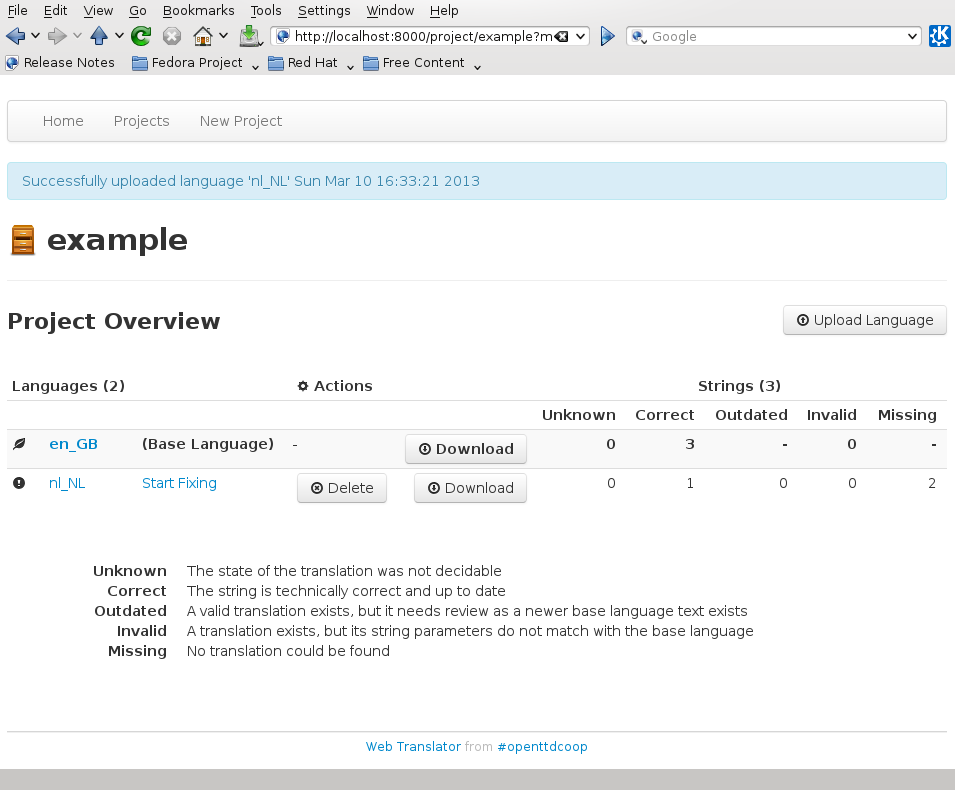
At the left you see a list of language names, starting with the base language.
Below Actions you see a Delete a language button, to remove a translation language from the project (you cannot delete the base language). There are also Download language buttons for each language that output a language file ready for use in the project.
At the right, you see how many strings exist in the project, and the state of the strings in each language:
- Unknown
- The state of strings here is not known (does not happen, usually).
- Correct
- Correct strings are newer than the translation, and use the same string commands. Whether the actual text actually translates the meaning of the base language is a different matter.
- Outdated
- Strings here are older than the latest change in the base language, so they need to be checked.
- Invalid
- These string use different commands (the text between curly bracket for example {BLACK}). They need to be fixed.
- Missing
- These strings do not exist in the translation yet.
From this overview, you can either go to the Language overview page by clicking at the name of the language, or you can start Editing strings by clicking at the Start Fixing link.
Language overview
The language overview page lists all strings. It is often too big to display at a screen. It looks like
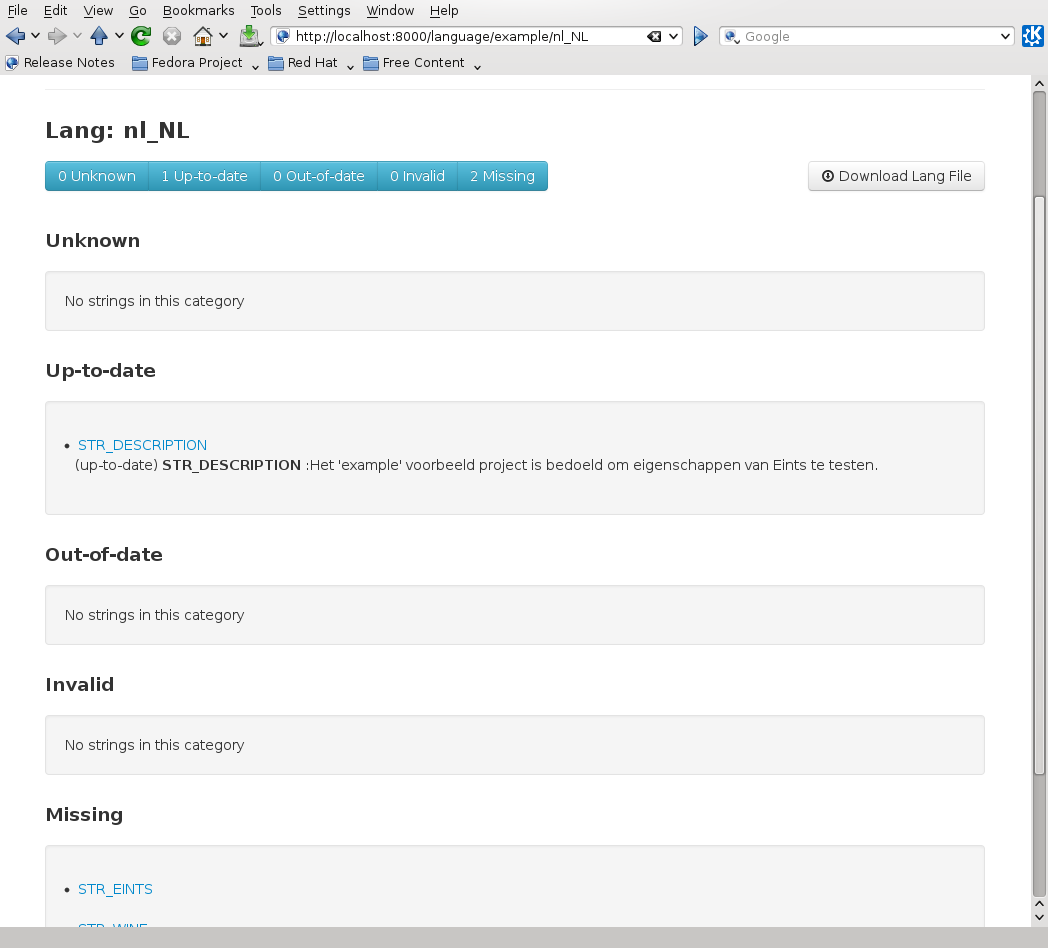
At the top a bar to directly jump to each section. It also has the same counts. Each section shows the current text of each string (except for the missing strings of course).
If you click at a string name, you can start Editing strings.
Editing strings
Editing a string is done at the following page.
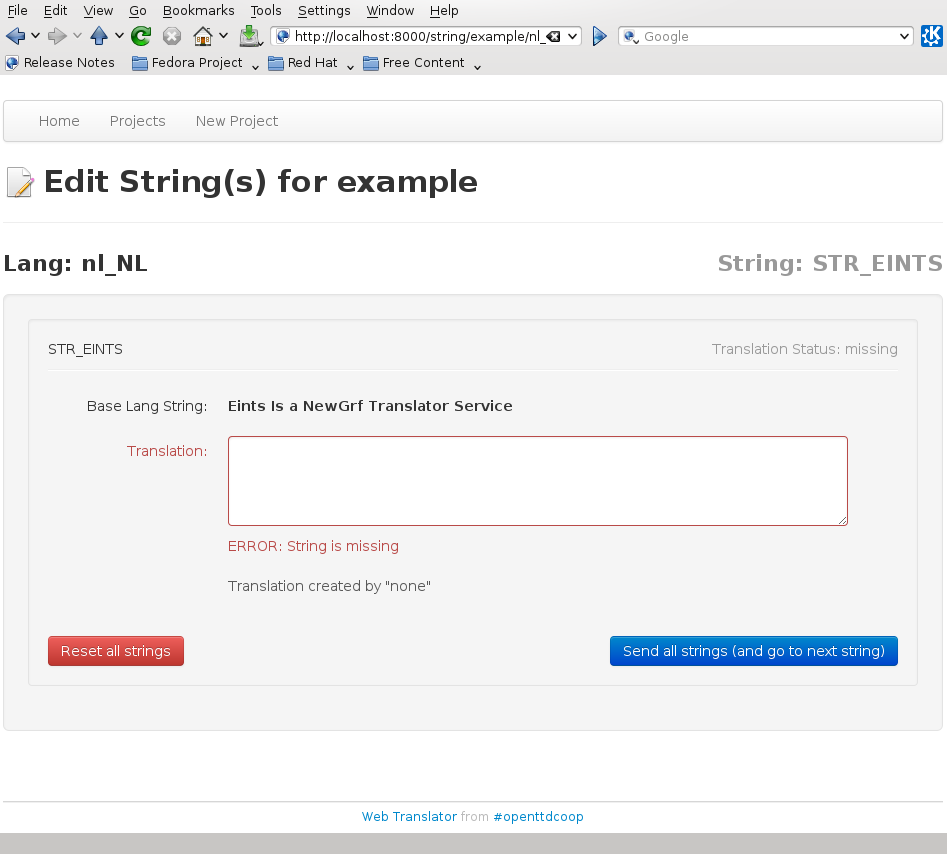
In the center, an edit box for entering (or modifying) the text of the string. Above it in bold font is the content of the string in the base language, so you know what to translate.
If the translation has cases, the program will make such a translation box for every case in the language. The first one (the default case) must always be filled, the other ones may be left empty.
When you are happy with the new text, press the Send all strings button at the right. If you made a mistake and are not sure what you changed, press the Reset all strings button at the right, and all changes you made on this page will be reverted.
If the string is correct, the program will bring you to the next string to translate, or to the Language overview page if all strings are done.
Upload a language
To create or update a language in the project, you need to upload a language. The page looks like
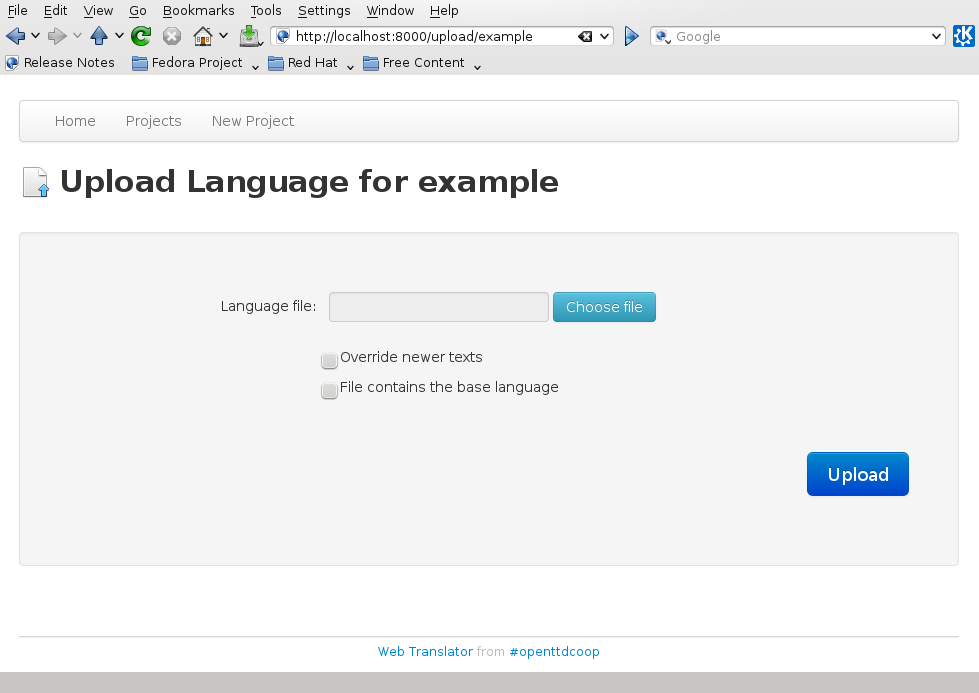
In the form, select the language file from your system. If you are uploading a base language, tick the bottom checkbox (It serves as a check that you upload the right kind of file, and are not by accident overwriting something else.)
The top checkbox labeled Override newer texts is almost never needed. If enabled, it forces that the strings of the file are seen as the newest version in all cases.
If you downloaded a language file previously, and are now uploading it again, the strings may have changed in the mean time by a translator. If you want to overwrite those changes, tick the Override newer texts check box.
Finally, press Upload, and the program will take you back to the Project overview page.
Delete a language
To delete a translation, press the Delete language button in the Project overview page, and you will get a page like
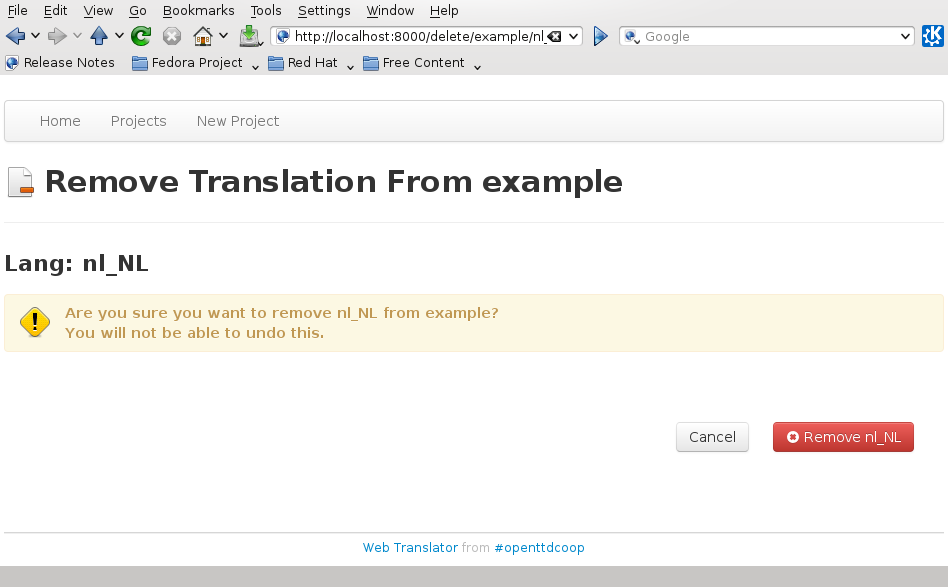
Deleting a language means you will be deleting everything of that language, in particular its history gets removed.
If you are sure the language should be deleted, press the Remove button.
After deleting, you will return to the Project overview page. If you change your mind again about the language, you can re-add it by uploading its language file again.
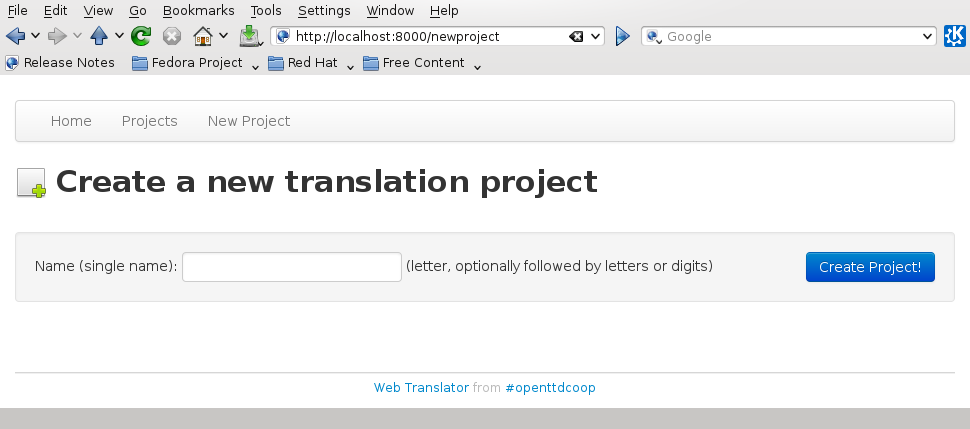
Create a new project
To create a new project, enter a name in the form, and press the button.
You will likely need to edit the projects.dat file as well, and restart the server.